Ecomm Product Photography
LEARNING TO SHAPE LIGHT
Hey friends, thank you for for being here and for your interest in product photography. Above is a quick three minute video that shows how to shape light in a beautiful way to better feature your product. These principles can be used across all types of photography in addition to product photography.
OVERVIEW | ECOMM PRODUCT PHOTOGRAPHY
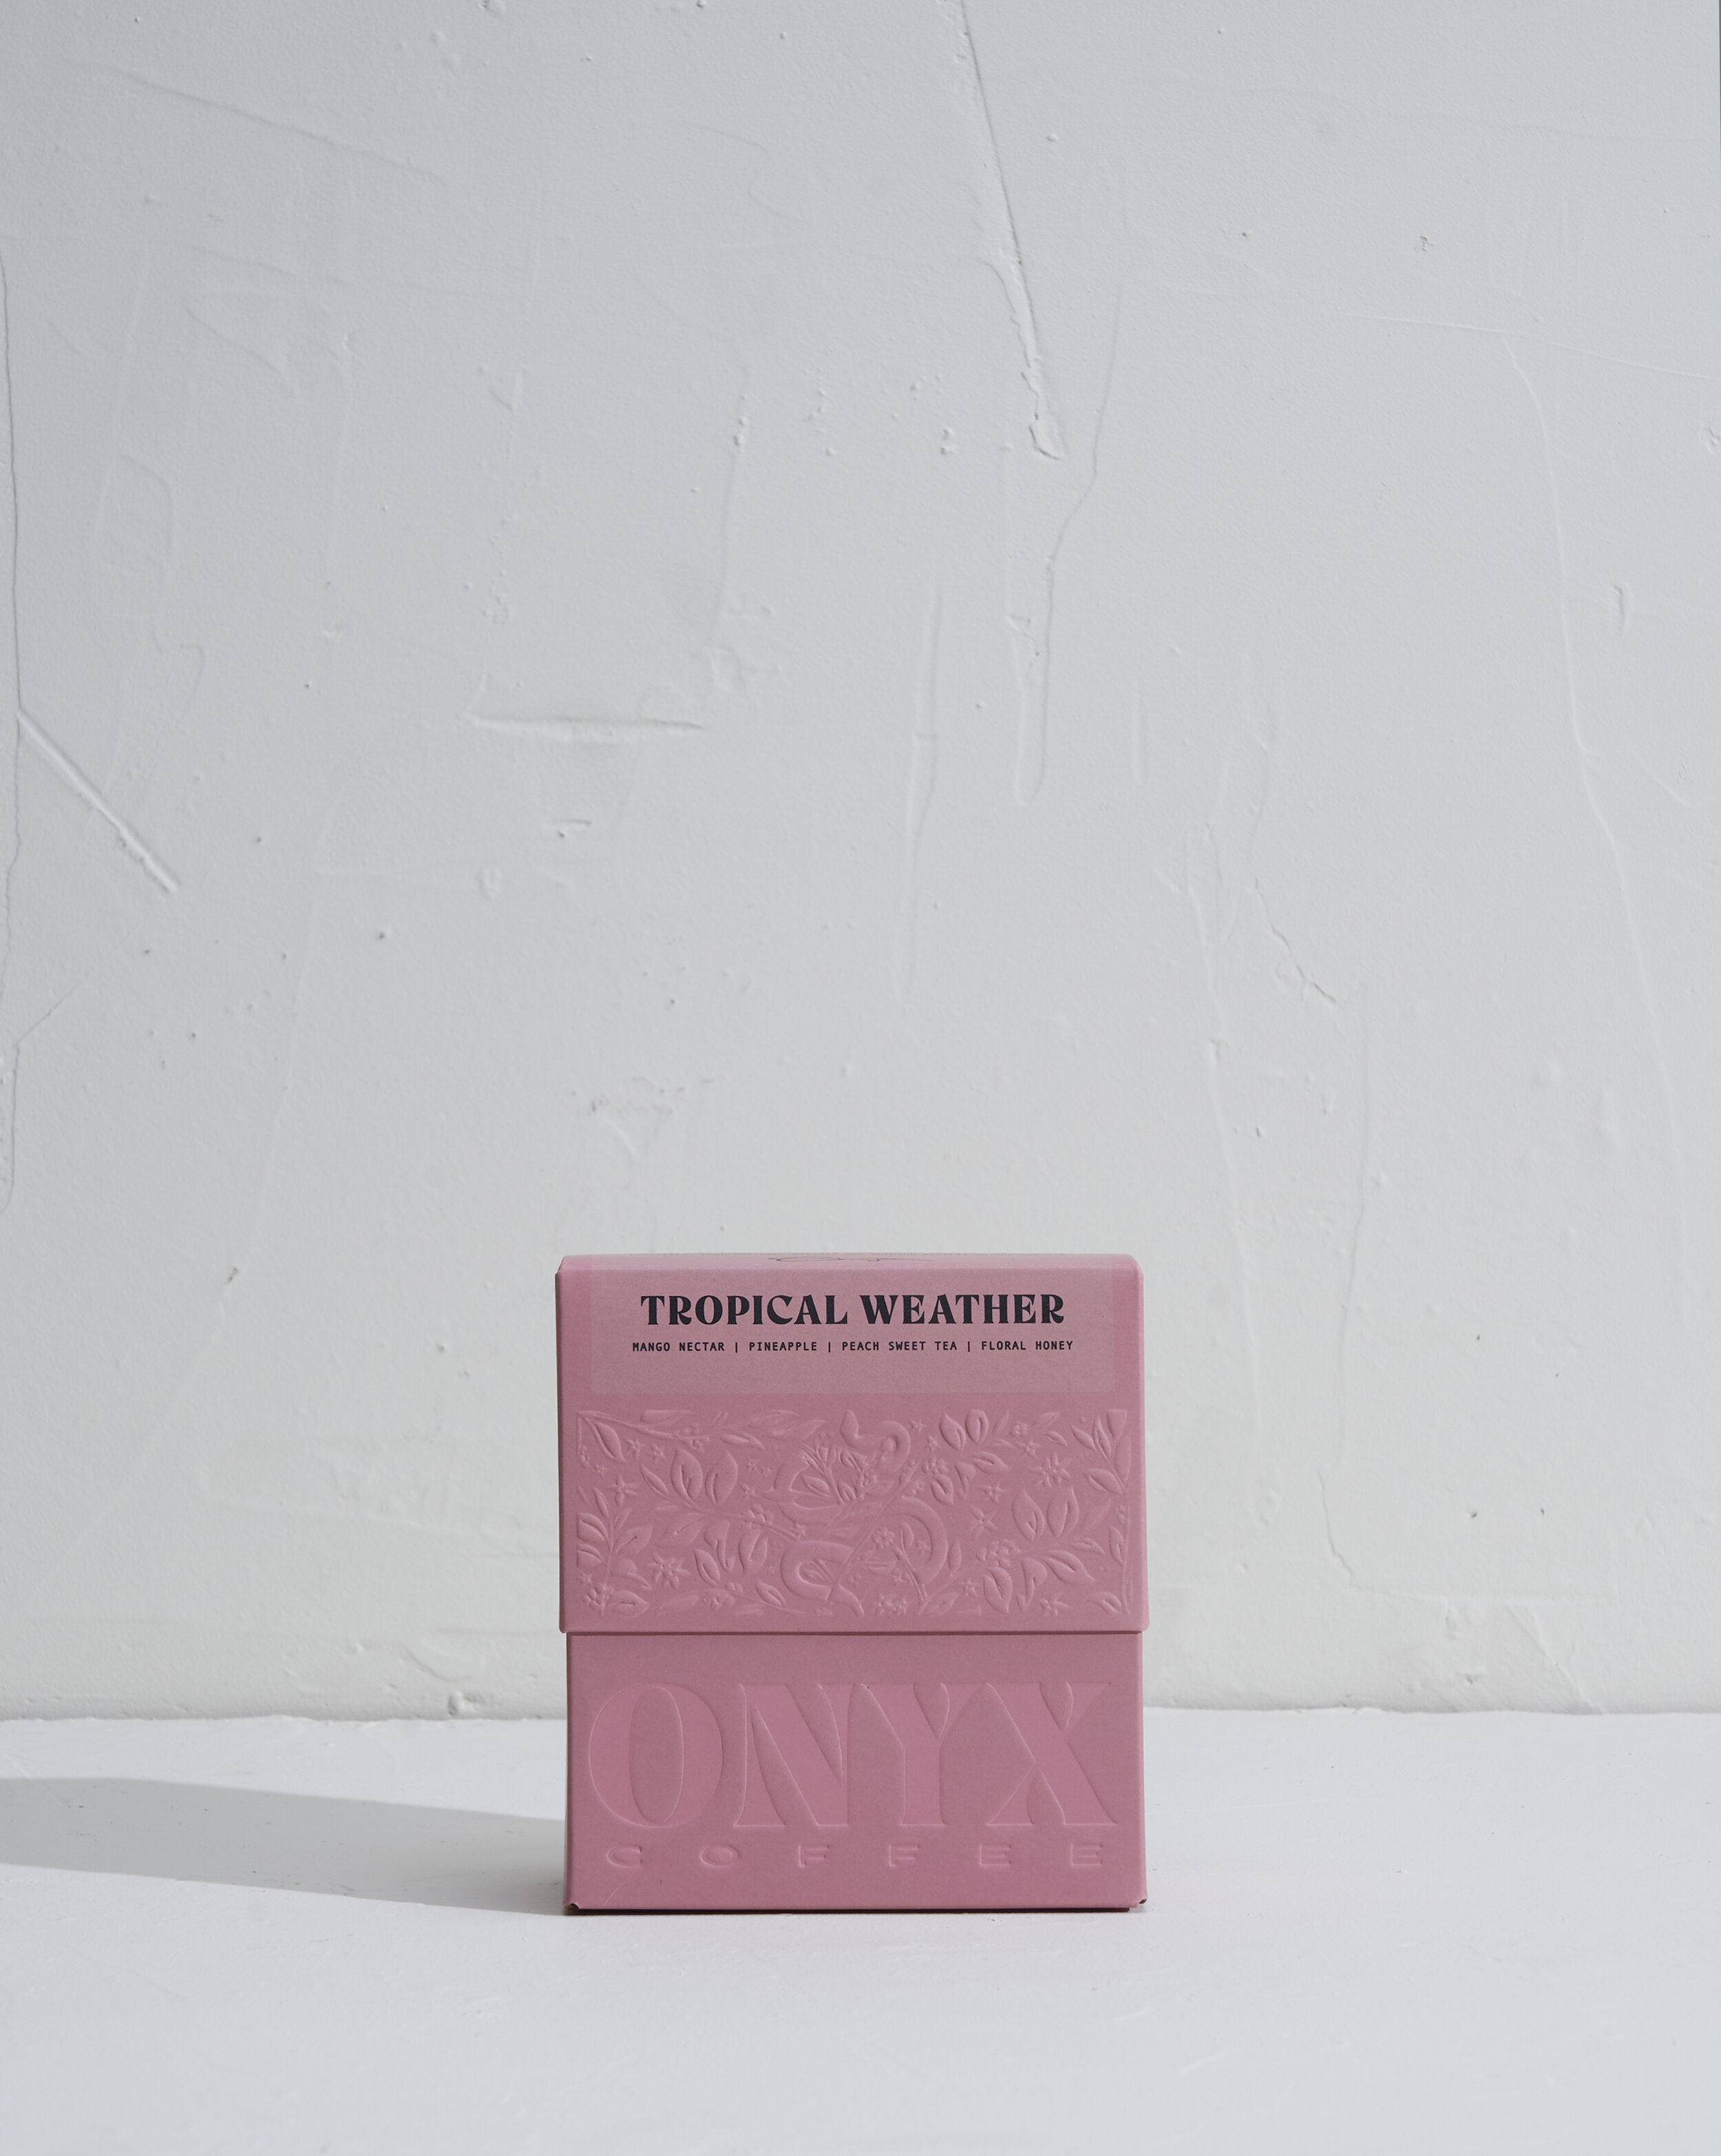
We're going to re-create this beautiful image from scratch using two flashes.
BREAKDOWN | ECOMM PRODUCT PHOTOGRAPHY
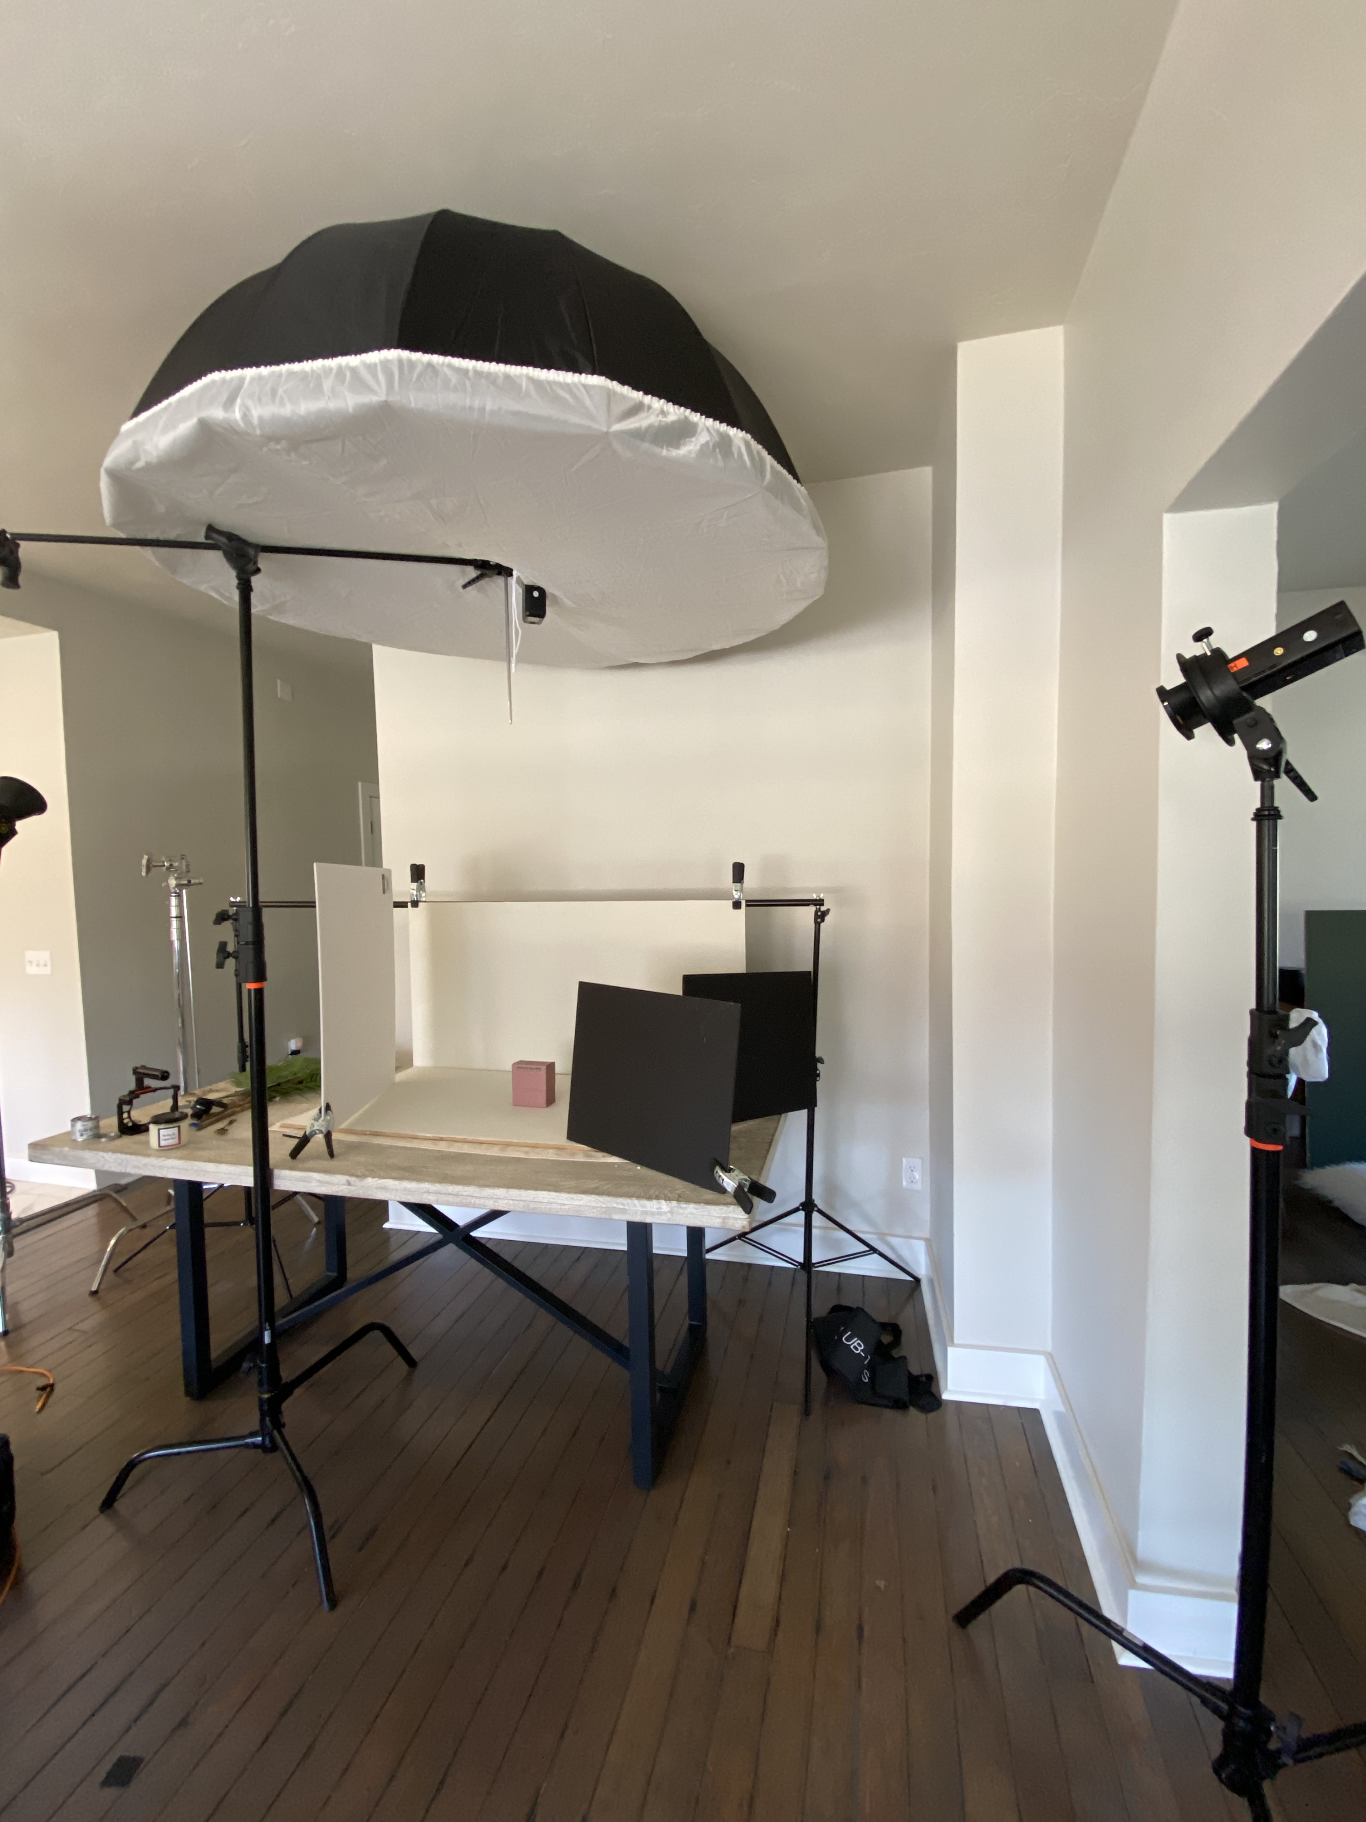
This is a 2 light setup
1 soft light for fill
1 hard light as my key
Our backdrops are custom made for around $30
(2) 4x2 MDF board from Home Depot ($14)
Quart of paint ($10)
Texture is Joint compound that's skip-trowel'd ($7)
My only props are palm leaves
You can buy them inexpensive on Afloral.com
CAMERA SETTINGS | ECOMM PRODUCT PHOTOGRAPHY
ISO: 100 - no need to go higher and introduce noise when you control the light
Aperture: F/14 - I want everything focus
Shutter Speed: 1/250 - This is as high as most cameras go
White Balance: Custom - use a grey card
LIGHTING | ECOMM PRODUCT PHOTOGRAPHY
I know I want the scene really well lit for this. I'm going to boom my fill light out above the product. This should illuminate everything evenly. I need to leave room for the key light to shine!
I'm going to put my key light 4-5ft off the table to create some crisp shadows. No diffusion for this light.
This is looking clean as-is BUT we can do better.
LIGHTING | ECOMM PRODUCT PHOTOGRAPHY
I'm adding a bounce card to fill in shadows on the product.
We're going to shape the light around the product to draw your eye in. We do this by deleting light. "Negative fill". I'm adding two black foam boards that are creating a spotlight of sorts for the coffee to sit in.
We're casting shadows onto the background to a.) draw attention to the product and b.) add an element of interest that's relevant to the product. -- USE PROPS THAT MAKE SENSE -- The farther away from the light the harsher the shadow. You can create different looks by pulling the leaves closer to the light. I leave the modeling light on so I can see exactly where the shadow will hit.
There you have it. If you have any questions let us know below.
More Tips, Tricks, & BTS
If you liked this, subscribe for more. We send out resources like this weekly to help with your photography journey. No catch. Just helpful content.


